Topp, you want to try the current server version. No problem, let's start together.
You have several options for this; You can either directly Load ISO file at Microsoft (various languages available), you can also drag the finished VHD image that then runs in your hypervisor (only English) or you don't even look at the whole thing onPrem but directly completely in the Azure Cloud of MS, the details are nice the AzureMarketplace described.
But all these versions have one thing in common, namely the time limit of these versions to 180 days. Anyone who has previously downloaded Eval versions knows this. In addition, this installation must also be activated within the first 10 days, otherwise the instance simply shuts down. It should also be in the back of your mind.
Well, enough geeiert, let's go:
Step 1: Installation with ISO
Start your hypervisor or create with the ISO file and Rufus or Ventoy a bootable USB stick to install the trial version on your desired hardware.
Once the boot sequence has been completed, the installation starts. In the case of the ISO installation, you can select the language and the keyboard layout, you can read and accept the Microsoft GTC and finally choose whether the standard or data center installation should be selected, that's it.
Immediately afterwards, the installer starts, if you go via Hyper-V you can then choose the future resolution of the virtual deskop and assign an admin password and then you are already in the middle of the configuration of the system.

If, by the way, you need the graphical interface – which can be quite helpful in the beginning if you do not manage the server remotely via another one, please select the Standard or Datacenter version with the addition (desktop display). Although it needs more space for the installation and more resources during operation, it also looks like this at the point:
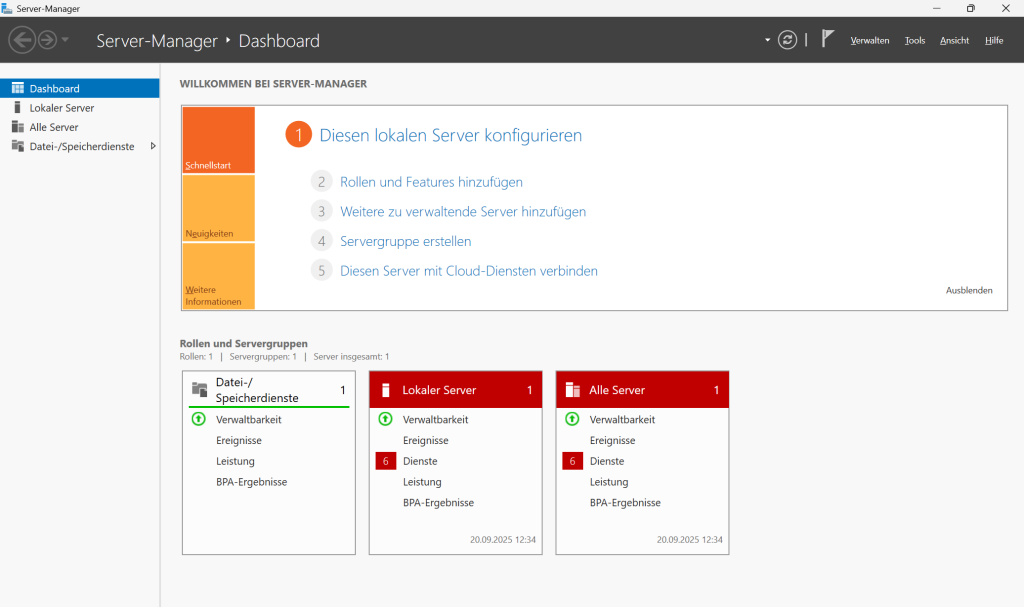
All right, so the whole thing's going on. Another job well done? Well, not quite yet, ‘bissl noch’ to be happy. By the way, you can completely ignore the wild warning messages you see in the ‘Local Server’ and ‘All Servers’ areas, during the setup they will all disappear by themselves as if by magic. ⁇
In the next step, I would recommend adding drivers to the system that increase performance. Let's say you have been on a Windows host system since then and have set up this server via Hyper-V, then you will probably already have the appropriate drivers when installing the system. Nevertheless, a look at the device manager can not hurt. In the GUI in the Server Manager Dashboard that waits for your input after the start, go to the top right under Tools, where you will find the old known ‘computer management’ and below it the device manager.
Alternatively, Windows key + X or right mouse on Windows start button and there in the dropdown select the entry or enter Win + R and devmgmt.msc, all options take you to the same destination. However, the very hard ones can also click on the start icon in the graphical interface, then select Settings, there in the left tab System and scroll down to start the device manager as the last option below. You do you. ⁇
In an ideal world, all drivers from the host system have already been passed through (unless you want to use a certain, possibly more performant one) and you have nothing more to do here.
However, if you have now, for example, put the whole thing under Proxmox, the first thing you should do is VirtIO Drivers install, even the QEMU Guest Agents make sense, possibly even VirtIO Guest Tools. Anyone who has allowed the system direct Internet access can also start the download directly from the VM. (However, it is not best practice to surf on the server!) If your system runs with substructure VMware then just according to the VMware Tools, If you use Nutanix, you can use it again. VirtIO Driver Suite back.
So, let's say drivers let's put a catch on it.
Now you could (if you already have an internet connection) have updates installed. If not, no problem, let's look at it later. Continue with the basic configuration of the server.
Step 2: Server as DC in absolute basic configuration
We start in the dashboard of the server manager, what we need in any case is a decent name, so that we can find the system later in the zoo, a static IP address and basic network configuration. To do this, we go to the left to "Local Server" under the menu or to the prominent text "Configure Local Server that you see in the dashboard as the first option. There we click on the computer name and change it. However, we will postpone the restart required for the takeover first, before proceeding further down in the same window at ‘Ethernet’. There we set a static IPv4 address, deactivate IPv6 for convenience for our test setup and specify as DNS server the above IPv4 also that we need to configure fixed addresses later in order to be able to upgrade the system as a domain controller.
Now we can perform the restart, check via a ping in the command line whether we can reach the gateway and an external address, for example with ping 8.8.8.8 One of the Google DNS servers. If that works, it goes on.
Next, go to "Manage" in the top right corner of the dashboard and select "Add roles and features". In the following window we select role-based or feature-based installation (should the preselection be) click on, in the next window select our server (which now has a decent name if you have done all the steps above.
In the next window you will see the roles you can install on this server. First of all, we need the Active Directory Domain Services and the DNS Server. You can click on the rest until the bottom right install is available. Then back on it and off you go. Depending on the hardware underneath, it may take a few minutes once the installation of these roles is complete, the system will notify you of the successful installation and you can confirm with ‘close’.
From this moment on, you will have two new entries in the dashboard, once the AD DS, i.e. the ActiveDirectory domain services as well as the actual DNS area. In addition, there is now also a warning message, namely at the top right that says that it is necessary to upgrade the server to DomainController.
You click on this and in the following there are the options to either integrate the server into an existing domain:
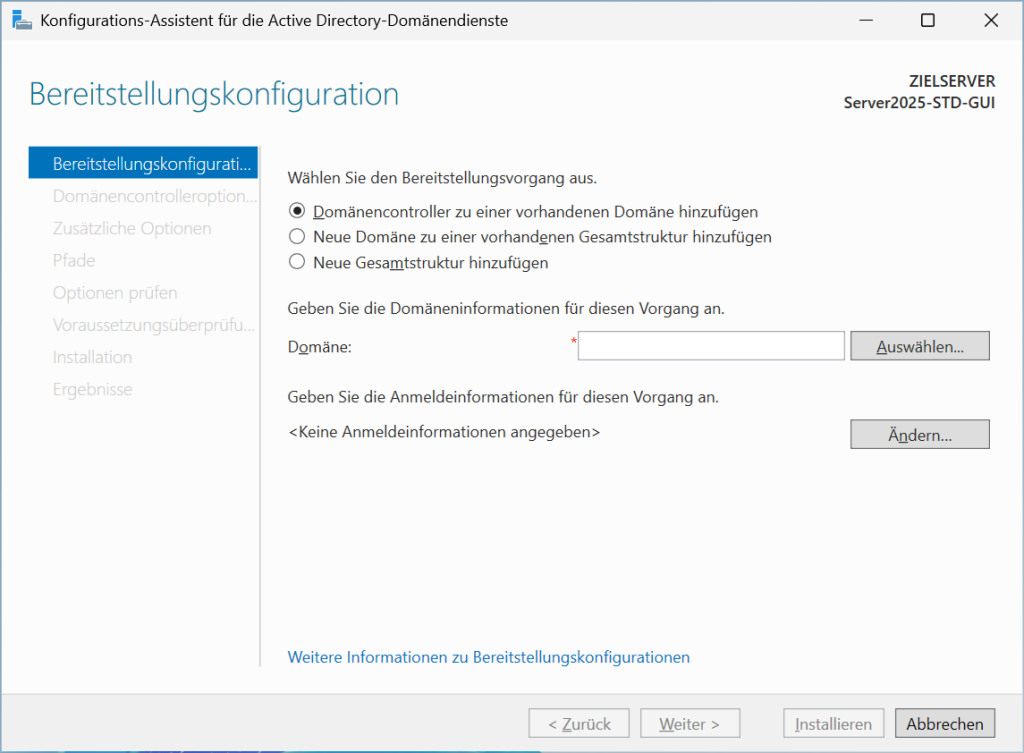
The only thing you choose would be "Add a new overall structure" and assign a domain. heimnetz.local or home.lan would be okay for a test environment if you set up a production system directly, so please indicate your real domain there. Anyone who wants to read on, Please turn here.
In principle, you can leave the following options completely standard for your test environment and simply click through again for installation, – no, wait, 1x you have to assign an additional DSRM password that you need for directory service recovery. What This Exactly Is the Infrastrukturhelden.de nicely explained. You can also ignore the following DNS warning message here. As soon as the installation starts, the system itself wants to be restarted 1x, the ‘transport’ can take quite a few minutes on older hardware, just have a little patience.
After the installation, you will first see a change on the login screen, because now you no longer have to enter your password, but first the username and in addition there is now a third field in which you specify which domain you want to log in.
Congratulations, the new DC is now running! I would like to leave a few words about best practice here. Even if it seems convenient to pack this DomainController now still funny with services, because anyway a complete environment is already set up, you can only advise against it urgently. The reason is relatively simple. If at some point something should be with the DC and you have to take it offline, all other services that you have provided on it would also no longer be available. In general, such a system would be redundant, by the way, to ensure that at least one is always really available. – Not absolutely necessary to try out in our test set-up, but keep it in mind when setting up a productive system!
Here at the guys from nt4admins.de Very nicely explained some of these problems. They even go one step further and recommend to install the DC itself exclusively BareMetal, because especially the performance in a virtual setup suffers if the write cache is deactivated by the DC role, for example, in order to avoid data loss.
If we now take a look at the DNS configuration, (the easiest way is via Windows key and the input of dns) you will find your forward and reverse lookup zones in the opening DNS manager, among other things. In the forward zone you can find your server, the reverse is still empty at the beginning. All Details about DNS are super described at learn.microsoft.com, If you need a deep dive. Very roughly, Forward resolves your server name according to IP address and reverses address to name.
What we want here now is to set up a new Reverse Lookup Zone. To do this, we right-click on them and select ‘New Zone’. We want a new primary zone and it should also be stored in AD. If you have not set up the DC as described above, it will not work, then please scroll up again.
All others can click through, and when setting up the first DC in the domain, the next setting "On all DNS servers running on domain controllers in this domain (middle option) also fits. Later we will adjust something for the redundant DC here.
In the next step, we select IPv4 and specify the first 3 areas of our predefined network segment as the network ID. The system then automatically translates that down into the new reverse lookup zone. Again I can recommend learn.microsoft.com, If you are looking for more input on the subject.
Well, now we are setting up the system in such a way that it can automatically request external DNS servers if it needs to be routed outside this home network, but in the DNS Manager on the left in the tree structure, we simply right-click on the server name and select ‘Properties’ almost at the bottom. In the "Forwarding" tab, you can now specify a DNS server that you have on the network, e.g. Technitium, AdGuard or PiHole itself hosts, otherwise it does the Cloudflare or Google DNS, respectively 1.1.1.1 or 8.8.8.8.8. Others might also come into question, details will answer you if you are interested but also a short Heise.de article Or a Google search.
All right, one more step. Depending on how long your server is now running, everything in the dashboard is probably now ‘green’.
Step 3: Integrate clients into the domain.
And further on...
Now we would like to invite a client into the domain, for this he needs on the one hand an account with which he can log in and on the other hand a change to the configuration of the system in order to log in to the domain instead of locally or via Microsoft account on the computer in the future.
So we start on the DC where we create an account. This is most convenient in the Server Manager Dashboard at the top right under ‘Active Directory Users and Computers‘ In the window that opens, select ‘Users’ on the left and then right-click ‘New“ and in the submenu then “users‘. In the input mask you have to assign at least the name as well as the user login name. Your domain is already pre-selected. So if Max Muster is to log in with the username maxmuster in the future, that's your minimum information.
After that, double-click the user in the right window or right-click the properties. In order for the user to dial in via the DC with his remote desktop, two changes have to be made. On the one hand, he must become a member of a group that is allowed Remote Desktop, which we can solve first in the tab ‘Member of’ in which we assign the group ‘Remote Desktop Users’ to the account. To do so, click on ‘Add’, then write in the Remote Desktop Users search box and click on ‘Check name’.
On the other hand, in the ‘Select’ tab, we select the ‘Allow access’ network access permission. That's all.
Now the new user Max Muster with username maxmuster can log in to the domain. How does he do that? Good question. We log in locally to the client computer, go to the Windows key and text ‘Computer name’ then scroll down a bit to Related links and click on ‘Domain or workgroup. In the following window, we can then switch from ‘working group’ to ‘domain’ in the lowest option. The name must be the one you chose when setting up at the DC. If you no longer know this, look in the dashboard under ‘Configure this local server’ as the second entry on the top left.
As soon as you have made the entry, Windows requires a login as administrator of the domain controller, so you have to enter the access data of the DC Admin once in order to be allowed to join the domain. The system requires a restart and from there you can switch the user (bottom left) and log in to the client via the domain with your user data configured at the DC.
So that was the most necessary in the graphical interface for a domain controller on Windows 2025 Server.