A fairy tale of one who moved in to learn to fear the radio – in 3 acts
As luck would have it, the old pink ghetto blaster in the dining room died just in time, so that a suitable replacement had to take place to provide the breakfast sound and other media services. Apropo coincidence: Just at this time, an iMac 27′′ Mid 2011 has also crossed my path, which is still really chic except for minimal wear and tear.
You probably already know that this good piece is allowed to serve. But before that I should expect a few hurdles and one or the other burning tire to jump through was also there.
Why upgrade an iMac Mid 2011?
Despite its age, the iMac is still a very useful device, especially after a strategic upgrade. With the right modifications, the service life can be significantly extended and the performance significantly increased. The 21.5′′ and 27′′ models offer different upgrade options, with the larger model offering more flexibility.
Act 1, Stage 1, Preparatory phase
iMac Mid 2011 Upgrade and Reinstall Guide
Point-like checklist for hardware upgrades
What is possible in such an old box? How or where do I start?
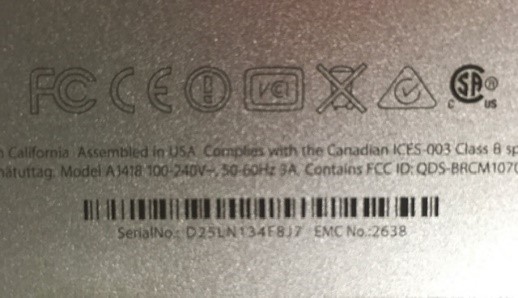
A good starting point is basically to take a closer look at the device. Usually there is an indication of which year, which series or possibly even directly which model it is. With the iMac that fell into my hands, the information was first of all quite ‘clear’:
You can see a bunch of logos and a serial number at the bottom. You can do something with that, can't you? Short answer: Yes, yes. Here e.g.. Type in the serial number and Apple will tell you what it is and if there is any warranty on it.
In this case, the website spits out the following after entering:
iMac (21.5′′, end of 2013)
Date of purchase: November 2013
Serial number: D25LN134F8J7
If you want more detective work, you can also here through Go and look for his model. Third possibility for external assessment: In the second line is still Model A1418 – this gives us, among other things: iMac 14.1 back.
Great, now we know relatively exactly what it is here, if you do not come directly via the serial number, the CPU clock frequency can be unclear at most, otherwise the exact model would have to be determined.
So you know what was originally installed – what is maximum possible – or what makes sense. In our example above, this would have been nice, but the good piece that I have here is iMac 27′′ Mid-2011, model series 12.2 – Means for me the following:
- RAM upgrade: Up to 32GB DDR3-1333 RAM possible (officially 16GB)
- SSD installation: Replace hard drive with SSD for significantly better performance
- Temperature sensor: When changing HDD to SSD, be sure to consider temperature sensor cables
- External GPU: Not possible with this model
- CPU: Non-upgradable (soldered)
Plan B
Now you can of course say just drive up the box and look at the dialog from the operating system, there you see all the information you are looking for. Basically, I fully agree, but it is quite possible that the system does not go up at all. Ok, ok, I already know that you all have an external SSD with matching MacOS flying around to start for such a case via Command / ALT button from this disk. And yes, even those who have now thought of a USB boot stick are not wrong.
Let me just say this: Many roads lead to Rome.
Act 1, Level 2 – Tool check
Tools and preparation are unfortunately mandatory, do not skip, otherwise :-/
- Special tools: Suction cup, spudger, torx screwdriver (T6, T8, T10)
- Antistatic equipment: Antistatic bracelet recommended
- backup: Create Time Machine or Full Data Backup
- workplace: Clean, well-lit work surface
- Magnetic holder: For small screws
- Cloth gloves: Against fat finger taps
A few words about cleanliness: No matter what you do, you will probably have dust particles on the glass pane inside on the first try, which can be removed with a cloth and glass cleaner. Also, you should work with the gloves to avoid ugly fingerprints on the display and glass.
And if you have compressed air at the start and you think you are doing the system something good I can spoil you: Swirled dust in the room then gradually settles either on display or glass cover inside. Be careful, please.
Oh, another one because we're in it right now. The RAM slots are also best not blown through as if they were NES cartridges – the same reason, afterwards you have dust between display and glass!
Act 1, Level 3 – Crafting!
Let's start with the RAM, 4x2GB out and 4x4GB in there is already 16 instead of 8. Pay attention to which modules were in it before, the older Apple boards are sometimes bitchy.
Oh, and please don't mix different RAM under any circumstances, this can go well, or work for a while, but believe me, you will be insane if after a few months suddenly completely unexplainable problems occur. Did I possibly get the good piece for exactly the reason? Good question. I'll leave you a picture from the assembly I have expanded:
2x 10600Ser with 2x12800S modules – In principle, it is amazing that this was the way it went:
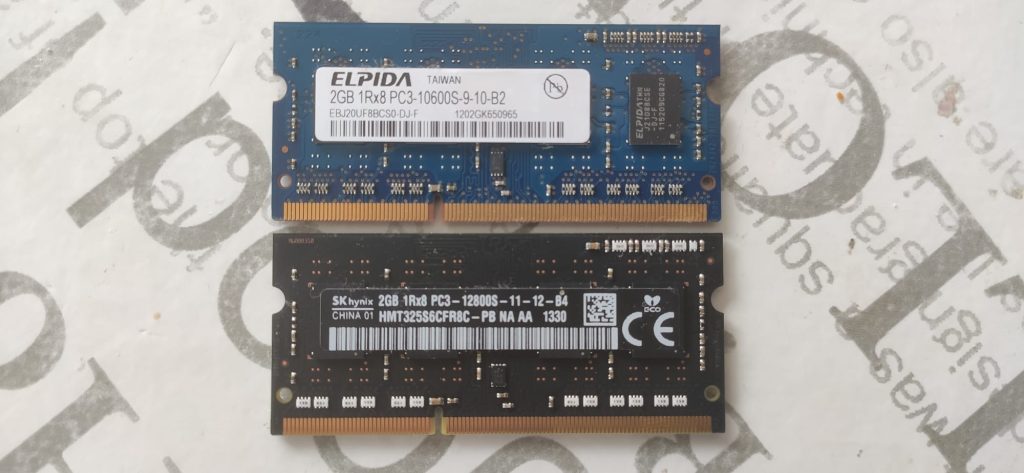
You'll notice that the only visible normal screws on your iMac are in the middle at the bottom of the display, revealing direct access to memory. But you can also start directly and see what is currently installed. The plastic tabs help you get to the SO-DIMM RAM blocks – and yes, even if it feels like it, you won't tear them off. Bitsl right left wobble helps, however, if the RAM is absolutely stuck.
So next step as below in the video the HDD out and for it a SSD in and then we are already through with the hardware modifications. We remember the information from above: We leave the CPU as it is and because I was once there like a GPU upgrade went wrong, we leave the fingers running for so long. ⁇
Optionally, you can also treat yourself to a second SSD if necessary, for example at IfixIT Everything you need.
For everything else you need the tool from above, because the rest is nicely hidden behind the display and only accessible via it. But I'll spare you 30 minutes of full text here, instead watch this video of Stevinho or alternatively the Variant of DrDuu:
Hardware upgrades according to Google:
RAM Upgrade - The Most Cost-Effective Improvement The iMac Mid 2011 comes standard with 4GB of RAM, but can be expanded up to 32GB (unofficial). Apple officially gives 16GB as the maximum, but many users have successfully installed 32GB. Use DDR3-1333 SO-DIMM modules. Access to RAM is via a flap at the bottom of the device – one of the few easy-to-use repairs at Apple.
SSD installation – The biggest performance boost Switching from a traditional hard drive to an SSD brings the most dramatic performance gain. Boot times are reduced from minutes to seconds, and the overall system response is greatly improved. But here is the biggest challenge: The iMac must be opened completely, which usually requires the replacement of the display and the loosening of many adhesive connections. (Here we are one step further)
Critical point - temperature sensor When installing an SSD, the temperature sensor of the original hard drive must be observed. Without this, the fan is constantly running at full speed. Solutions are a temperature sensor cable for SSDs or software such as Fan Control.
Disassembly and technical challenges
Dismantling an iMac is definitely not for beginners. The display is attached either magnetically or with strong adhesive tape and must be carefully loosened with heating (hair dryer or hot air gun). There is a risk of damage to the display or injury to hot components.
Step-by-step disassembly:
- Turn off iMac and remove all cables
- Dissolve display with suction cups and careful heating
- Carefully disconnect the display cable
- Internal components are now accessible
- In case of hard disk replacement: Observe temperature sensor cables
- Installing new components
- Assemble everything in reverse order
Preview of Act 2:
Software reinstallation
- macOS compatibility: Maximum macOS High Sierra 10.13.6
- Bootable USB flash drive: Create with macOS High Sierra
- Firmware update: Check and update before installation
- Format hard drive: Using GUID Partition Table
- Internet recovery: No longer available as backup option (supplied with OSX 10.7)
After installation
- Software migration: Migration Assistant or manual data transfer
- System updates: Install all available updates
- Temperature monitoring: Install Mac Fan Control or TG Pro
- Performance test: Test hard drive and RAM
TL:DR
Finally, there is something on the eyes, have fun with the 3-month experiment with keno from c’t 3003